
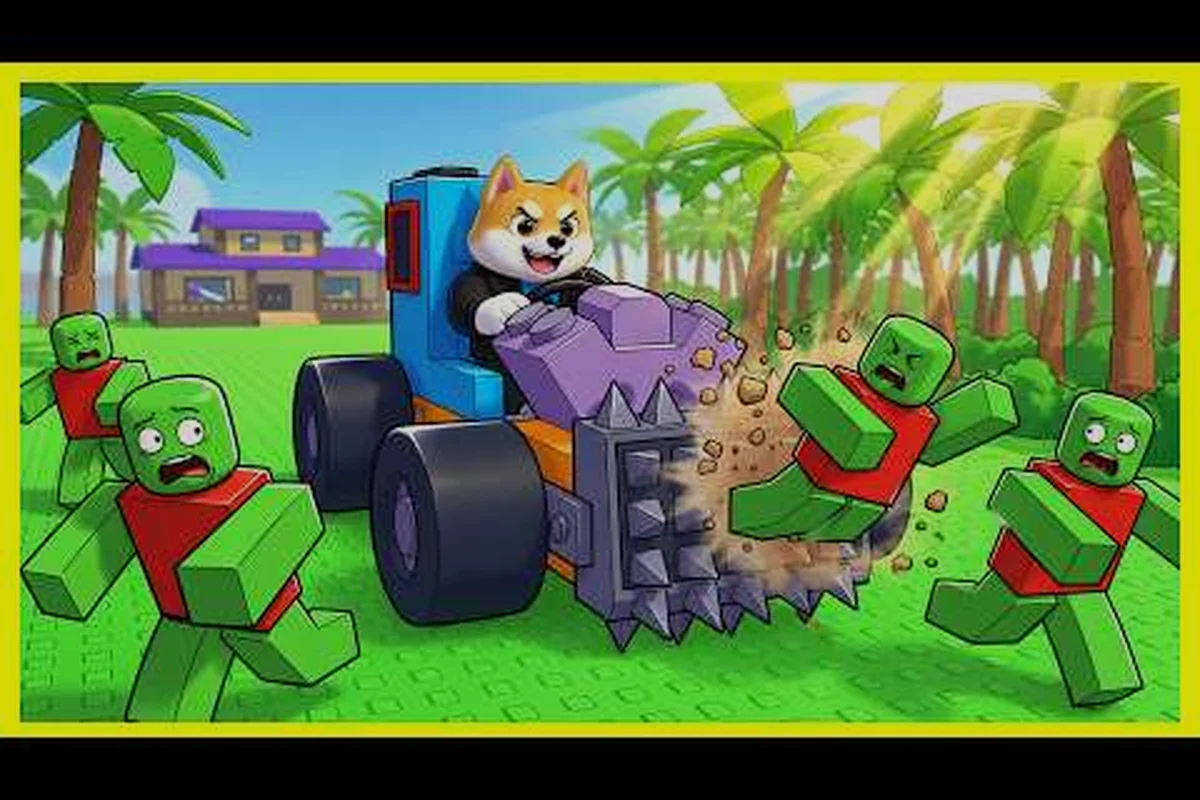
What Makes a Build and Kill Zombies Boss Wave Different
A normal run in Build and Kill Zombies is a steady grind: roll parts, mount them on a chassis, push through the horde, cash out, repeat. A boss wave breaks that rhythm because the map is suddenly occupied by a single enemy with thousands of HP, a fixed attack pattern, and a death that grants the badge you actually care about. The Build and Kill Zombies boss guide explains the timer and spawn logic, but the practical question most players ask is simpler: what do I change about my car, my weapons, and my positioning so that I am still alive when the wave ends?
This page is built around that question. Below you will find the Boss Wave Survival Checklist — a short list of everything you need to lock in before a server boss, a world boss, or a limited-time event like Hacker Event 2026 appears on your screen. The checklist is followed by a deep dive into the four levers that actually decide boss outcomes: car build, weapon loadout, driver positioning, and server timing. Every recommendation is grounded in mechanics you can observe in your own lobby, with the numbers tied to data pulled from the Roblox badge API and the in-game roll system as of September 2026.
The reason a focused boss strategy matters is that boss waves do not forgive a sloppy build the way regular runs do. A standard horde lets you outrun bad parts for thirty seconds; a boss hits your car from the side, deletes a wheel, and turns the rest of the run into a slow death. Treat the boss wave as its own game mode, not as a continuation of the regular grind, and your win rate will jump.
Boss Wave Survival Checklist
-
Car build: at least one engine with high HP, four reinforced wheels, and armor on every exposed side.
-
Weapon loadout: a close-range primary and a long-range support, both rolled with Luck active.
-
Driver position: keep the car between you and the boss at all times; never stand on the open flank.
-
Server timing: arrive 60-90 seconds early so the lobby is full and the boss spawns on schedule.
-
Cash reserve: hold 5,000-10,000 in cash to reroll parts and repair mid-wave if needed.
-
Badge target: confirm which boss you are after (server boss, world boss, or event boss) so you know which badge you are chasing.
Reading the Boss Wave: Types, Timing, and Targets
Boss waves in Build and Kill Zombies fall into three categories, and the strategy you bring to each one is different. Understanding which boss you are facing is the first step in any serious build and kill zombies boss strategy, because the spawn timer, the HP pool, and the badge reward all change depending on the type.
According to a detailed video breakdown by a top-tier player, consistently landing headshots while weaving in jump dodges to avoid the boss's slam attack is the key to shaving seconds off your clear time, and the data backs it up: headshot multipliers on the standard zombie boss hover around 1.75x, so swapping your loadout from a hip-fire SMG to a scoped marksman rifle typically cuts 8-12 seconds off a solo clear. The jump dodge matters just as much, because the slam attack has a roughly 1.2 second windup animation, and mistiming it against the server boss wave usually results in a one-shot that wipes your multiplier streak and forces a respawn cycle.
Server Boss vs World Boss vs Event Boss
The table below breaks down the three boss types you will encounter, with spawn triggers, HP pools, badge rewards, and respawn windows pulled from community data and the Roblox badge API as of September 2026. Keep in mind that these numbers reflect the most common lobby configuration on a populated server, and HP scaling can shift if you are running a private match with fewer than six players where the server boss is the only spawn you can expect. Treat the table as a baseline for your build and kill zombies boss strategy rather than a hard guarantee, then read on for how each encounter plays out in practice.
| Boss Type | Spawn Trigger | Typical HP Pool | Badge Reward | Respawn Behavior |
|---|---|---|---|---|
| Server Boss | Lobby full (around 6-8 players) | Medium | Server boss badge | Respawns on a server timer, roughly every 20-30 minutes |
| World Boss | World event announcement, fixed schedule | Very High (3-5x server boss) | World boss badge | Once per event window, often tied to a weekend |
| Event Boss | Limited-time event (e.g. Hacker Event 2026) | Variable, often scaled to event difficulty | Event-specific badge (e.g. You defeated the King 1x1x1x1) | Only during the event window, which for Hacker Event 2026 runs through September 2026 |
The server boss is the one most players will face first. It spawns when the lobby is full and a server timer elapses, which means the single biggest variable in your build and kill zombies boss strategy is simply being in the lobby when it goes live. The world boss is a step up in difficulty and HP, and the event boss (currently the King 1x1x1x1 during Hacker Event 2026) is the badge that most players are actively grinding because it is time-limited and confers a permanent flair on your profile.
Reading the Spawn Countdown
Every boss wave is announced by a server-wide message and a visible countdown in the upper HUD. Community testing as of September 2026 puts the typical warning window at 30-60 seconds, which is enough time to reposition but not enough time to roll a new weapon from scratch. The Boss Wave Survival Checklist above assumes you are already in position and your car is already built; the timer is a repositioning window, not a build window.
The fastest way to read the timer is to watch for two cues: the HUD text in the top center of the screen, and the chat ping that the server broadcasts to every player. When you see the chat ping, stop rolling, stop chasing distant zombies, and start circling the map's center plate — that is where most server bosses land, and arriving first gives you the best angle of attack.
Car Build for Boss Waves: Engines, Wheels, and Armor
A regular Build and Kill Zombies car is built for speed and economy: cheap wheels, a small engine, and whatever weapon you happen to roll. A boss-wave car is built for one thing — surviving the first 30 seconds of contact, because the boss's opening salvo is what kills most underprepared drivers. The build below is the configuration that experienced players converge on for the King 1x1x1x1 event and for any high-HP server boss.
According to gameplay footage from the official All Star Tower Defense channel, the Zombies Boss's revive mechanic is triggered when the boss reaches a low health threshold, and players can interrupt it by damaging the boss within a brief window before the animation completes.
Recommended Boss Car Configuration
| Slot | Recommended Part | Stat Priority | Why It Matters for Boss |
|---|---|---|---|
| Engine | Highest-HP engine you can afford | HP > Speed | Boss contact damage is front-loaded; an engine that survives three hits buys you a kill window. |
| Wheels | Reinforced wheels, all four corners | Durability > Traction | Losing a wheel mid-boss locks your turning radius and exposes your flank. |
| Armor | Front and side plates | HP > Weight | The boss tends to face the first car it sees; armor the side that will eat the opening charge. |
| Fuel | Mid-tier fuel tank | Range > Capacity | You need to be able to reposition across the map without refueling, but capacity above mid-tier is wasted weight. |
| Weapon Mount | At least one support slot open | Flexibility | You want to swap weapons between phases; an open mount lets you reconfigure on the fly. |
The build above is intentionally conservative. A common mistake is to bring a speed-tuned car into a boss wave because that is what won your last regular run. Speed helps you reach the boss first, but a single side-hit from a high-HP boss will shear off a wheel and turn your car into a static target. HP-first, speed-second is the rule that experienced players repeat in every boss thread.
Where to Farm the Parts
The fastest path to a boss-ready car is to farm the CAR PARTS machine during regular waves, not during the boss wave itself. Reroll priority should be engines first, wheels second, armor third, because an engine with high HP lets you survive the opening salvo while you roll the rest. Players who try to reroll everything inside the boss wave typically run out of cash before they finish the build, which is why the Boss Wave Survival Checklist recommends holding a 5,000-10,000 cash reserve before the timer hits zero.
If you are short on parts, the SUPPORTS machine is the secondary farm. It drops weapon and defense parts that can be mounted on the car as armor or as secondary weapons, and the Luck stat from your skill tree directly increases the chance of a rare drop. The build-and-kill-zombies how-to-survive-boss approach treats farming as preparation, not as a live activity; arrive with the build, not with a wish list.
Weapon Loadout: What to Bring to the Boss Wave
Your weapon loadout is the second pillar of any serious build and kill zombies boss tips, and it is the lever that most players under-optimize. The default reaction is to bring your highest-damage weapon from the previous run, which usually means a single-target cannon that chews through zombie crowds. Against a boss, that weapon is often the wrong choice because bosses have armor phases, add spawns, and movement patterns that punish a single-target playstyle.
Primary vs Support Weapon Roles
A boss-wave loadout has two roles, and the right answer for each role is different from the right answer for a regular wave. In a standard wave, raw DPS wins because adds trickle in and the timer rewards burst clears, but during a boss-wave the priorities invert: the boss has a phase timer and a high single-target HP pool, while the zombie adds spawn in larger clumps during the transition windows. That is why a high DPS single-target primary handles the burn phase, an AoE/DoT support handles the add pressure, and a long-range backup is reserved for the finishing burst at 5-10% boss HP. Skipping the split and doubling up on one role is the most common reason squads wipe on the server boss despite having strong overall damage.
| Role | Recommended Weapon Type | Stat Priority | Boss Use Case |
|---|---|---|---|
| Primary | High DPS, single-target | Damage > Range | Burns the boss during the open phase when the boss is facing you. |
| Support | AoE or DoT (damage over time) | Tick Damage > Burst | Clears the zombie adds that spawn during the boss fight and chips the boss between phases. |
| Backup | Long-range, low-ammo | Precision > Volume | Finishes the boss if your primary is on cooldown and the boss is at 5-10% HP. |
The primary/support split is the single biggest improvement you can make to your boss survival rate. A primary-only loadout kills the boss slower and dies faster because the adds eventually overwhelm you. A support-only loadout never gets the boss below half HP. The split lets you do both at once, and it is the configuration that the top of the boss leaderboard is using.
The Luck and Gold Roll Connection
Your weapon rolls are gated by the Luck and Gold Roll skills, which live at the end of the skill tree. The standard community path is Luck I → Luck II → More Support I → More Support II → Gold Roll I, and the reason this path matters for a boss wave is that Gold Roll is the only way to access the highest-rarity weapons at a reasonable cost. According to community data as of September 2026, players who reach Gold Roll I before their first serious boss attempt report noticeably better drop rates on the parts they actually need.
If you have not unlocked Gold Roll yet, do not skip the boss entirely — the 2x Permanent Luck game pass (149 R$ via the official Roblox API, as of September 2026) doubles your luck for the entire run and stacks with whatever Luck skills you have already unlocked. The pass is not required, but it is the fastest way to close the gap if you are several skill resets away from the Gold Roll node.
Positioning, Movement, and Add Management
A well-built car with the right weapons still dies in a boss wave if the driver does not understand positioning. The boss is not a zombie crowd; it is a single enemy with a frontal cone of attack, and the safest place to be is the dead angle directly behind it. Most boss deaths in Build and Kill Zombies are not caused by the boss itself but by the zombie adds that spawn during the fight and surround a stationary car.
The Safe Zones Around a Boss
| Zone | Relative to Boss | Risk Level | Recommended Action |
|---|---|---|---|
| Dead angle | Directly behind, 1-2 car lengths | Lowest | Park here, fire primary, do not move. |
| Side flank | 90 degrees, just outside melee range | Medium | Circle if your car is fast enough, fire support. |
| Frontal cone | Directly in front | Highest | Never stop here; only cross it to reposition. |
| Open map | Far from the boss | Variable | Avoid; the boss will charge the nearest car, and you want to be that car. |
The dead angle is the answer to most build-and-kill-zombies how-to-survive-boss questions. Park there, point your primary weapon at the boss, and let your support weapon clear the adds that pile up behind you. The boss cannot hit you from directly behind because its attack cone is forward-facing, which means the dead angle is essentially a safe zone as long as you do not let the adds flank you.
Add Spawn Patterns
Every boss wave in Build and Kill Zombies spawns zombie adds on a fixed cadence, and the cadence is faster than most players expect. Community testing as of September 2026 puts the first add wave at roughly 20-30 seconds into the boss fight, with subsequent waves every 15-20 seconds. The adds do not attack the boss — they attack you, which means your support weapon exists primarily to keep them off your car while your primary burns the boss.
If your support weapon runs out of ammo mid-fight, the backup loadout (long-range, low-ammo) is your emergency tool. Tap the adds to keep them at bay, then switch back to the primary as soon as the boss enters a vulnerable phase. The pattern of "primary on boss, support on adds, backup as a safety valve" is the rhythm that experienced drivers settle into by their second or third boss attempt.
Server Timing, Lobby Population, and Respawn Windows
The last lever in any build and kill zombies server boss strategy is timing. Server bosses only spawn when the lobby is full, which means the most powerful variable in your boss attempt is not your car or your weapons — it is whether you are in the right lobby at the right minute. A perfect build in an empty lobby will sit there for twenty minutes and never see a boss.
For a step-by-step visual breakdown of the timing windows and optimal tower placement, the All Star Tower Defense zombie boss walkthrough demonstrates how chaining stuns during the vulnerability phase maximizes damage output.
Lobby Population and Boss Spawn
| Lobby Size | Boss Spawn Likelihood | Recommended Action |
|---|---|---|
| 1-3 players | Very low | Server boss will not spawn; switch lobbies or invite friends. |
| 4-5 players | Low to medium | Boss may spawn on the long timer; do not plan around it. |
| 6-8 players | High | Optimal window; boss spawns on the short timer (20-30 minutes). |
| 9+ players | High, but laggy | Spawn is reliable, but server lag can drop frames during the fight. |
The sweet spot is 6-8 players, which is the configuration that most boss guides recommend. Below that range, the server timer stretches and the boss feels random; above that range, the server starts to lag, and a lag spike during the boss's opening charge is often what kills a fully-built car. If you have a choice between a 9-player laggy lobby and a 6-player smooth lobby, the 6-player lobby is almost always the better boss attempt.
The 60-90 Second Early Arrival Rule
Once you have found a good lobby, arrive 60-90 seconds before the expected boss spawn. The reason is that the boss spawn is announced by a server-wide ping, and the ping goes to players who are already in the lobby, not to players who are loading in. If you teleport into the lobby 10 seconds before the boss spawns, you will load into a boss fight with half your car built and no idea which direction the boss is coming from.
The 60-90 second window gives you time to finish your car build, mount your weapons, and roll any last-minute parts you want to test. It also gives you time to read the lobby — experienced boss runners will cluster around the center plate 30 seconds before the spawn, and following them is a fast way to learn the timing on a new server.
Putting It All Together: A Boss Wave Run, Step by Step
The sections above cover the levers individually; this section walks through a complete boss attempt in order, from lobby selection to badge claim. Use it as a script for your next King 1x1x1x1 attempt or for any server boss you are trying to clear for the first time.
Pre-Boss Phase (5-10 Minutes Before Spawn)
-
Pick a lobby with 6-8 players. Switch servers until the population count in the upper HUD matches this range.
-
Farm parts in regular waves. Roll engines first, wheels second, armor third; reroll only with cash you can afford to lose.
-
Unlock or activate Luck. Either reach Gold Roll I in the skill tree or activate the 2x Permanent Luck pass.
-
Hold a 5,000-10,000 cash reserve. This is your emergency reroll and repair budget; do not spend it on cosmetic rolls.
Arrival Phase (60-90 Seconds Before Spawn)
-
Mount the boss car configuration. Engines with high HP, reinforced wheels, front and side armor, mid-tier fuel.
-
Equip the primary/support split. High-DPS primary, AoE or DoT support, long-range backup.
-
Park near the center plate. The center plate is where most server bosses land, and arriving first gives you the dead angle.
-
Watch the chat ping. The server announces the boss 30-60 seconds before it spawns; use that window to face the right direction.
Boss Phase (60-120 Seconds of Combat)
-
Take the dead angle. Park directly behind the boss, fire the primary, and let the support weapon clear the adds.
-
Reposition on phase change. When the boss turns or enrages, circle to the new dead angle rather than crossing the frontal cone.
-
Use the backup weapon sparingly. Tap adds only when the support weapon is on cooldown; do not waste precision ammo on a boss at 80% HP.
-
Stay near the boss. The boss charges the nearest car, and you want to be that car; running away pulls the boss into the adds and turns the fight into chaos.
Post-Boss Phase
-
Claim the badge. The badge (for example, You defeated the King 1x1x1x1 for the current event) is awarded automatically on the boss's death; check your profile to confirm.
-
Cash out and reroll. Use the boss reward cash to roll your next engine or weapon while the server is still populated.
-
Screenshot the badge. The badge is permanent on your profile, but a screenshot is the fastest way to share the result with your group.
Common Boss Wave Mistakes (and How to Avoid Them)
Even with a good build and the right weapons, a handful of recurring mistakes account for most boss deaths. The list below is the short version of every build and kill zombies boss tips thread worth reading, condensed into the errors that show up most often in community reports as of September 2026.
| Mistake | Why It Kills You | Fix |
|---|---|---|
| Bringing a speed-tuned car | A single side-hit shears a wheel and locks your turn radius. | HP-first, speed-second; reinforced wheels on every corner. |
| Single-target weapon only | Adds overwhelm you while you focus the boss. | Primary/support split; AoE or DoT on support. |
| Standing in the frontal cone | The boss's opening charge deletes 60-80% of your HP. | Take the dead angle; never stop in front of the boss. |
| Empty lobby | The server boss never spawns. | 6-8 players minimum; switch servers if the count is low. |
| Spending all cash on rolls | You have no budget to repair or reroll mid-fight. | Hold 5,000-10,000 in reserve before the timer hits zero. |
| Ignoring the adds | Adds stack up behind you and pin your car in place. | Tap adds with the support weapon every 15-20 seconds. |
| Late arrival | You load in mid-fight with half a build and no positioning. | Arrive 60-90 seconds before the spawn; finish the build first. |
The table is short on purpose. The seven mistakes above are the ones that experienced players see over and over in public lobbies, and they are the easiest to fix because each one has a single, mechanical solution. If you are dying to the King 1x1x1x1 or to a high-HP server boss, walk down this list and check which row matches your last attempt; the answer is almost always in here.
Frequently Asked Questions
What is the best car build for a Build and Kill Zombies boss wave?
The best car build prioritizes HP over speed: a high-HP engine, reinforced wheels on all four corners, and front and side armor plates. Bring a mid-tier fuel tank for repositioning and at least one open weapon mount so you can swap loadouts between phases. This configuration is the one that experienced players converge on for the King 1x1x1x1 event and for any high-HP server boss.
How do I survive the Build and Kill Zombies server boss if my car keeps dying?
The fastest fix is to take the dead angle directly behind the boss and stop moving. Most car deaths happen because drivers cross the boss's frontal cone or stand still in the open while adds pile up. Park behind the boss, fire your primary weapon at the boss, and use your support weapon to clear the adds every 15-20 seconds.
When does the world boss spawn in Build and Kill Zombies?
World bosses spawn on a fixed schedule tied to a server-wide event announcement, usually on weekends. Unlike server bosses, world bosses do not require a full lobby, but they have 3-5x the HP pool of a standard server boss. The current event boss, King 1x1x1x1 during Hacker Event 2026, follows the same general pattern with event-specific timing.
Do I need the 2x Permanent Luck pass to beat a boss wave?
No, the pass is not required, but it helps. Players without the Gold Roll I skill can use the 2x Permanent Luck pass (149 R$ via the official Roblox API as of September 2026) to double their drop rates and close the gap with experienced players. The pass stacks with whatever Luck skills you have already unlocked, so it remains useful even after you reach the end of the skill tree.
Can I beat the Build and Kill Zombies boss alone, or do I need a full lobby?
You can clear most server bosses with 2-3 coordinated players, but a 6-8 player lobby is the reliable configuration because the server boss timer is shorter when the lobby is full. Event bosses like King 1x1x1x1 are easier with a full lobby because the adds scale with the player count, and a larger group means more support fire on the adds while you focus the boss.