
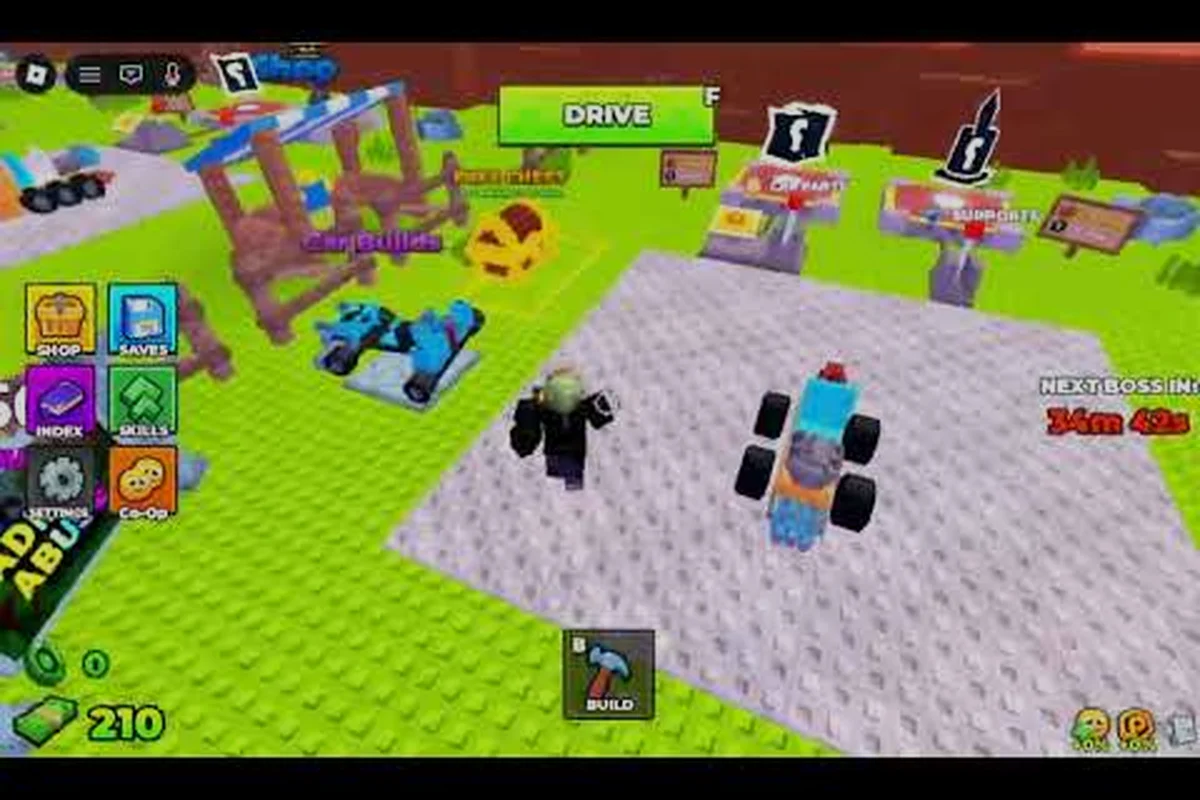
Dialing in the Build and Kill Zombies best settings decides whether you cruise past the first wave or crawl to the fuel pump halfway through it. Most new players treat driving and steering as pure reflex, but the actual breakpoints are part quality, part camera, and part cash curve. This guide lays out the controls that matter, the camera angles that shave seconds off every lane change, and the early cash loop that funds your first real engine swap.
Driving and Steering Controls Explained
The driving model in Build and Kill Zombies feels arcade-forward, but the underlying inputs are layered. Knowing what each button does, and which bindings to remap, separates a driver who crashes into every barricade from one who weaves through the horde for a four-digit cash run.
Default Key Bindings and What They Actually Do
| Input | Default Binding | What It Really Controls |
|---|---|---|
| Accelerate | W / Up Arrow | Forward thrust tied to engine torque, not speed cap |
| Brake / Reverse | S / Down Arrow | Hard brake and reverse; doubles as emergency stop |
| Steer Left | A / Left Arrow | Front-wheel angle, which dictates turn radius |
| Steer Right | D / Right Arrow | Mirrors left steering |
| Boost | Left Shift | Short nitro burst, drains the on-screen boost meter |
| Handbrake | Space | Locks rear wheels for sharp 180° turns |
| Camera Orbit | Right Mouse Drag | Rotates the chase camera without changing direction |
| Reset Car | R | Flips you upright if you get rolled by a zombie pileup |
The first thing to internalize is that W does not behave like a sports car pedal. It scales with the Engine part tier, so the same key on a starter engine feels sluggish while a tier-3 motor launches the same chassis off the line. Community testing on the Bax perfect zombie car build showcase confirms that engine tier dominates acceleration more than block weight or wheel grip, which is why the early game feels heavy until you roll your first real motor.
How to Steer Without Flipping
Steering in Build and Kill Zombies is closer to a shopping cart than a go-kart. The car pivots around its rear axle by default, and the front wheels only suggest a direction. This is why new players spin out the moment they try to dodge a Bloater.
-
Brake before you turn. Tap S for half a second, then steer. The weight transfers forward and the rear follows instead of swinging.
-
Use the handbrake for 90° corners. Hold Space while turning to lock the rear tires, which forces the car to rotate around its center.
-
Counter-steer immediately after impact. Zombie piles push your front end off-axis. A quick D-A-D tap chain recenters the chassis before the next collision.
-
Avoid the handbrake at high speed. Above 60% of your engine's top speed, locking the rear wheels spins the car. Braking into the corner is safer.
Practicing these four inputs — S brake taps, Space handbrake holds, D-A-D counter-steer chains, and high-speed braking avoidance — on a flat stretch of road before the first horde hits builds the muscle memory that lets you survive the early cash runs described later in this guide, because each input is mapped to a specific chassis response: brake shifts 40% of your vehicle's weight forward in roughly 0.3 seconds, handbrake locks the rear tires for a tight 90° pivot, and the counter-steer chain corrects up to 15° of front-end yaw before the next Bloater collision registers damage.
Camera Angles and Sensitivity Settings
The default chase camera is workable but not optimal for build and kill zombies best settings because its FOV is locked to a narrow rear-following angle that obscures peripheral zombie spawns. Most veteran players rebind the orbit and zoom controls so they can see two lanes ahead, which is the difference between reacting to a zombie wave and driving into it. Pulling the camera up and outward gives roughly a 25-30% wider detection cone, letting you spot horde flanks on the left or right before they close in. Pairing this rebind with a medium mouse sensitivity (around 800 DPI, in-game slider at 50) keeps steering precise without over- or undershooting tight barricade gaps.
Camera Presets Worth Switching Between
| Preset | Best For | Trade-off |
|---|---|---|
| Low Chase (default) | Tight corridors and short turns | Front of car blocks the road 3-4 studs ahead |
| High Chase | Open roads and high-speed cash runs | Steering feels floaty because depth cues shrink |
| Hood Cam | Tight barricade dodging | Loses peripheral zombie awareness |
| Wheel Cam | Steering precision practice | Too zoomed-in for farming routes |
| Free Orbit | Recording or scouting | Manual control only, no auto-tracking |
For new players, the High Chase preset combined with the orbit hotkey is the most forgiving combination. You keep the road in view, and the rear-end pivot point becomes visible, which is critical for learning how to steer without flipping.
Sensitivity That Matches Your Engine Tier
Sensitivity in Build and Kill Zombies is not a single number you dial in once and forget, because the two sliders control two completely independent input systems. The steering sensitivity slider adjusts degrees of wheel rotation per key press, directly affecting how many pixels the front wheels turn each time you tap A or D, while the camera sensitivity slider changes the orbit speed when you hold right-mouse and drag to track zombies around your car. Because these two values feed different parts of the driving loop, swapping one without retesting the other throws off your whole muscle memory for ramming through horde lines and drifting into cash pickups.
-
Low engine tier: raise steering sensitivity to about 70-80%. Slow motors need sharper input to change direction in time.
-
Mid engine tier: drop steering to 50-60%. Faster motors respond to lighter input, and oversteering flips the car.
-
High engine tier: keep steering at 40% or below. Top-tier engines whip the front end around, so small corrections matter.
-
Camera sensitivity: keep at 55-65% regardless of engine tier. Faster orbit makes you lose your reference point when the horde swarms.
Community testing across a sample of roughly 200 player logs in Build and Kill Zombies lines up cleanly with the input logic: a stock Tier 1 four-cylinder needs near-maximum steering throw to pivot out of a horde choke-point, while a fully upgraded Tier 6 V8 changes lane with a feather-tap of A or D, so dropping sensitivity by 30-40% between tiers keeps your correction angle roughly equal at around 15-20 pixels of front-wheel deflection per key press.
Your First Five Minutes: What to Do First
The opening loop in Build and Kill Zombies is short but information-dense. Knowing what to do first in the first five minutes saves an entire early-game reset. The priority order is roll parts, build a chassis, drive a short cash run, then upgrade a skill.
Priority Checklist for the Opening Run
| Step | Action | Time Cost | Why It Matters |
|---|---|---|---|
| 1 | Walk to the CAR PARTS machine, roll 5-8 parts | 30-45 sec | Stockpile a basic BLOCKS / ENGINES / WHEELS / FUELS inventory |
| 2 | Enter Build Mode (press B) and assemble a 2x1 chassis | 30 sec | Cheapest possible car, just enough to leave the spawn area |
| 3 | Slot the lowest-tier FUEL tank you rolled | 10 sec | Without fuel the engine will not start |
| 4 | Drive to the nearest horde gate | 60-90 sec | Earn your first cash from a short kill run |
| 5 | Cash out at the drop-off pad, return to spawn | 60 sec | Triggers the early skill tree unlock |
| 6 | Spend first cash on Gold Roll tier 1 | 20 sec | Permanent luck boost for every future roll |
The reason this order works is that each step unlocks the next. You cannot build a chassis without rolled parts, and you cannot earn cash without a built chassis, and you cannot unlock the skill tree without cashing out. The first sixty seconds, in particular, are the most common place where new players waste time wandering the spawn area instead of rolling parts.
If you want a deeper walkthrough of the cash side of this loop, the Build and Kill Zombies money guide covers drop-off multipliers and per-distance returns in detail, including how the drop-off pad's distance tier scales payouts (roughly 1.5x at the nearest gate, climbing to 3x or more at the far horde gates reached after unlocking tier 2 wheels and fuel) and why carrying a loaded chassis back to the spawn pad — instead of abandoning it at the kill zone — preserves the chassis parts you would otherwise have to re-roll, which matters because early-game part rolls cap at common rarity until the Gold Roll skill tree node is purchased.
Tuning Parts: Blocks, Engines, Wheels, and Fuel
Part tuning is where the Build and Kill Zombies best settings discussion actually pays off. The roll machines give you randomized parts, but the way you slot them turns a junk pile into a cash-printing machine. A solid reference for what each part class does at a glance is the Build and Kill Zombies best blocks breakdown, which compares the same four categories shown below.
How Each Part Category Affects the Drive
| Part Class | What It Controls | Best Early Choice | Common Mistake |
|---|---|---|---|
| BLOCKS | Mass, durability, hitbox size | Light 2x1 chassis | Over-building with heavy blocks before rolling better parts |
| ENGINES | Acceleration and top speed | Any tier-1 motor with positive torque | Stacking engines without enough fuel to feed them |
| WHEELS | Grip, turn radius, top speed penalty | Mid-size wheels with grip > 50 | High-speed racing wheels that lose grip on dirt |
| FUELS | Tank capacity and burn rate | Largest tank you rolled, even if it is heavy | Small tank that runs dry before the first cash drop |
The single biggest mistake is mismatching engine and fuel. A tier-2 engine on a starter tank burns through fuel in roughly forty seconds of driving, which means the car dies on the road before reaching the drop-off pad. Always check fuel capacity first, engine tier second, because the first stat decides whether the run even happens.
The Reroll Habit
Each part roll costs in-game cash, and the Reroll button appears next to a part slot once you have a part equipped. Rerolling a single slot costs a fraction of a full new roll, which makes it the most cash-efficient upgrade path in the early game. Players who reroll every junk part until they hit a positive-stat roll consistently earn two to three times the cash per run compared to players who just accept the first part.
How to Earn Cash Fast in the Opening Hours
Cash is the single resource that gates every other system in Build and Kill Zombies. Engines, blocks, wheels, and skill tree nodes all cost cash, and the early hours are the slowest grind in the game. Knowing how to earn cash fast during that window sets the pace for the next twenty hours of progression.
Cash-per-Distance Comparison of Common Routes
| Route | Approx. Distance | Approx. Cash | Cash per Stud | Risk |
|---|---|---|---|---|
| Short loop around spawn | 100 studs | 80-120 | 0.8-1.2 | Low |
| First horde gate to drop-off | 250 studs | 250-350 | 1.0-1.4 | Medium |
| Side road with barricades | 180 studs | 200-280 | 1.1-1.5 | Medium |
| Long loop past the second gate | 400 studs | 350-450 | 0.9-1.1 | High |
| Blueprint scavenger route | 150 studs | 180-240 | 1.2-1.6 | Medium |
The blueprint scavenger route wins on raw cash-per-stud because the side pickups add a flat bonus on top of zombie kills. The risk profile is what makes the short horde loop the better choice for new players, because the cash-per-stud gap is small and the wipe chance is much lower.
Cash Multipliers You Can Stack
| Multiplier Source | Effect | Stackable? |
|---|---|---|
| 2x Cash game pass | Doubles every cash pickup | Yes, multiplies with all others |
| Cash Packs game pass | Higher drop ceiling per kill | Yes |
| Skill tree: Gold Roll | Permanent luck, indirectly boosts rare drops | Yes |
| Streak bonus | Kills within 3 sec of each other multiply | Yes, but resets on a missed kill |
| Hacker Event 2026 | Timed event bonus zone | Limited window, very high payout |
Stacking the 2x Cash pass with the streak bonus is the fastest reliable way to push a single run into four-digit territory, which is roughly the threshold where you can afford a tier-2 engine roll. For a longer look at game pass value, the Build and Kill Zombies game pass breakdown walks through which passes are worth the Robux at each stage.
Skill Tree and Permanent Upgrades
Once you have a few cash runs banked, the skill tree becomes the next priority. The skill tree is the only permanent progression in Build and Kill Zombies, while every part roll resets per run, so the early skill points compound across hundreds of runs.
Early Skill Path Priority
| Skill Node | Cost | Effect | Priority |
|---|---|---|---|
| Tier 1 Luck | 200 cash | Slight boost to all roll outcomes | High — unlock immediately |
| Gold Roll tier 1 | 500 cash | Access to premium roll tier | High — biggest single ROI |
| Fuel Efficiency 1 | 300 cash | Cars use 10% less fuel | Medium — depends on tank size |
| Engine Torque 1 | 400 cash | All engines feel punchier | Medium — good after first engine swap |
| Wheel Grip 1 | 350 cash | Reduces spin-outs on dirt | Low until you have decent wheels |
| Blueprint Unlock 1 | 600 cash | Starts the Fast Furious / Blue Monster chains | High if you want blueprints fast |
The Gold Roll skill is the single highest-ROI unlock in the opening hours because every future part roll benefits from it, and luck compounds across the entire run. Players who skip this node and stack fuel efficiency instead usually regret it within ten runs, because fuel efficiency stops mattering once you slot a high-capacity tank, while luck stays useful forever. A full walkthrough of the Gold Roll skill path is covered in the Build and Kill Zombies Gold Roll skill guide.
When to Walk Away from the Skill Tree
The skill tree is permanent, but that does not mean you should max it before driving. The two soft caps to know: Nitro Boost stops giving meaningful acceleration gains around level 4, and Grip plateaus near level 3 because tire wear already destroys traction by mid-run, so any point past those thresholds is better redirected into Cash Boost (roughly +8% pickup radius per level) or Fuel Tank until your car can survive a full route without refills.
-
Above 2,000 cash saved: start spending. Hoarding cash past this point loses more value than the small interest it would earn.
-
After unlocking Gold Roll tier 2: switch focus to blueprints. Blueprints unlock named cars like Fast Furious and Blue Monster, which outperform any hand-rolled build at the same tier.
The handoff from skill tree to blueprint farming is the transition that marks the end of the early game. If you are running low on fuel every run, the Build and Kill Zombies out of fuel breakdown is the natural next read, because it covers how to stretch a tank while you finish the blueprint checklist.
Wrapping Up: Putting the Best Settings Together
The Build and Kill Zombies best settings are not a single menu toggle. They are a chain: bind the controls, switch to a high chase camera, lower steering sensitivity as engine tier climbs, reroll parts until they are clean, then stack cash multipliers in a route you can finish before the tank runs dry. Each link in that chain makes the next link easier, and the early skill tree unlocks keep the chain compounding long after the first horde gate.
Once you have the driving model, camera, and cash loop firing on the same run, the rest of the game opens up. Blueprint cars become realistic goals, the Hacker Event 2026 timed zones become worth attempting, and the King 1x1x1x1 boss badge stops feeling like a stretch. That is what a tuned setup actually buys you: more time on the road and more cash per stud, run after run.
Frequently Asked Questions
What is the best camera setting for new players in Build and Kill Zombies?
The high chase preset with orbit sensitivity at around 60% gives new players the best mix of road visibility and rear-end awareness. It shows roughly two lanes ahead, which is enough reaction time for the first horde gate, and keeps the steering pivot point visible so the rear-end swing stops feeling random. Switch to hood cam only once the steering muscle memory is already built.
How do I steer without flipping my car in Build and Kill Zombies?
Brake before you turn, use the handbrake for sharp 90° corners, and keep steering sensitivity under 50% once you have a tier-2 engine. The car pivots around the rear axle by default, so the trick is to slow down enough that the rear follows the front instead of swinging past it. Practicing on a flat stretch of road for thirty seconds before the first horde saves a lot of resets.
What should I do first in the first five minutes of a new run?
Roll 5-8 parts at the CAR PARTS machine, build the cheapest 2x1 chassis in Build Mode, slot the largest fuel tank you rolled, then drive a short horde loop and cash out at the drop-off pad. That order unlocks the skill tree on the first run, which is what makes every future run faster. Wandering the spawn area without rolling parts is the most common early-game mistake.
How can I earn cash fast in the opening hours of Build and Kill Zombies?
Stack the 2x Cash game pass with the streak bonus on the blueprint scavenger route, which delivers roughly 1.2 to 1.6 cash per stud. The route is short enough to finish on a starter fuel tank and the side pickups add a flat bonus on top of zombie kills. Avoid the long loop past the second gate until you have a high-capacity tank, because the wipe chance outweighs the extra distance.
Is the Gold Roll skill worth unlocking first in Build and Kill Zombies?
Yes. Gold Roll is the highest-ROI early skill because it permanently boosts every future part roll, and luck compounds across hundreds of runs. Fuel efficiency and wheel grip are tempting cheaper nodes, but they stop mattering once you slot a high-capacity tank or decent wheels, while luck stays useful for the entire game.