
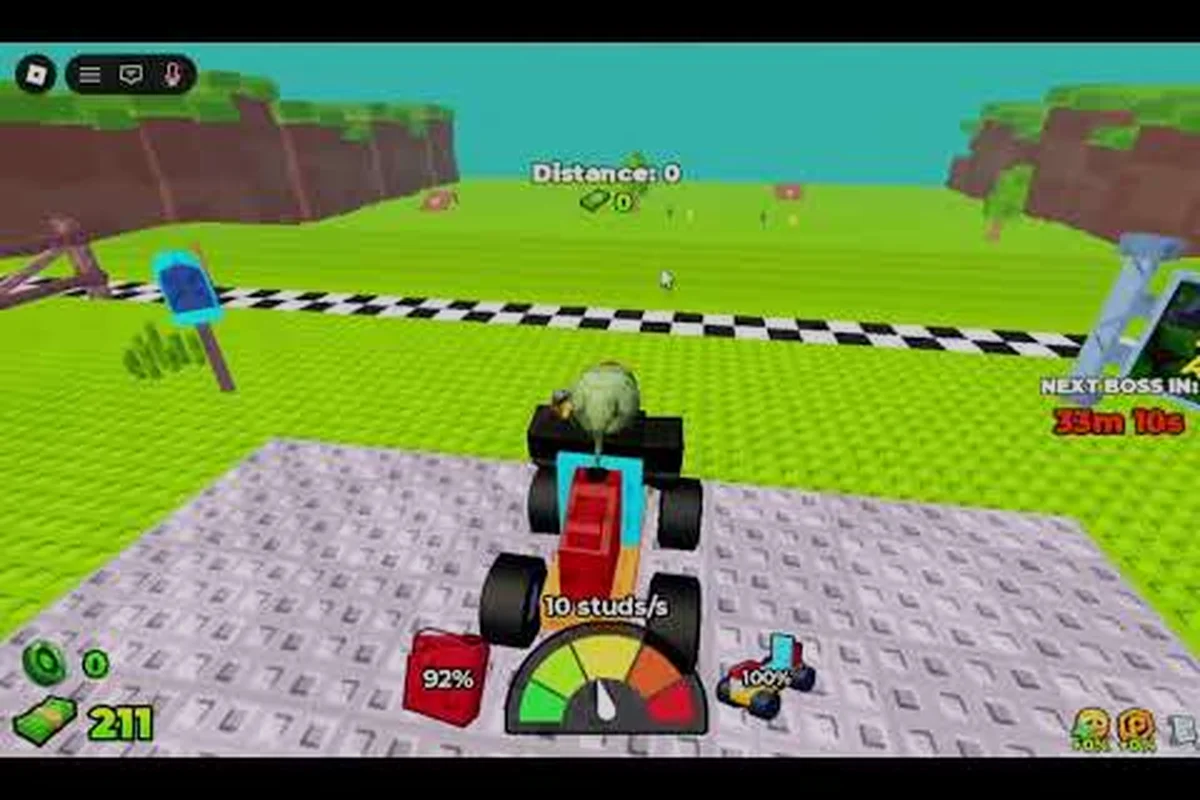
The Build and Kill Zombies gold roll skill is the late-game passive that swaps your normal roll for a guaranteed-rarity pull, and the grind to reach it is where most players misjudge their cash flow. Every permanent skill you buy eats into the same wallet that funds your next CAR PARTS and SUPPORTS rolls, so the order you unlock things in directly controls how fast your cars stop falling apart at wave 12. This guide maps the cheapest path to Gold Roll, breaks down the actual skill cost versus the long-term savings, and shows what to max first when your cash reserve finally allows it.
The Gold Roll skill in Build and Kill Zombies allows players to earn bonus in-game currency by achieving specific kill milestones, and according to the official Build and Kill Zombies showcase video, the ability's gold rewards scale based on the number of zombies eliminated within a single round.
What the Gold Roll Skill Does and Why It Matters
Gold Roll sits at the back end of the Build and Kill Zombies skill tree, and unlocking it changes the entire feel of the lobby grind. Instead of gambling rolls at the CAR PARTS machine and hoping the pity timer or luck buff finally hands you a Legendary wheel, a Gold Roll pull forces the rarity upward on its own — which means fewer bricks of Common fuel tanks clogging your inventory and more parts that actually move your build forward.
How Gold Roll Differs From a Normal Roll
A normal roll at either the CAR PARTS or SUPPORTS machine resolves through the standard rarity table, weighted by your current Luck stat and any active 2x Luck or 4x Luck server buff. Gold Roll bypasses most of that spread. The pull still respects the four categories (BLOCKS, ENGINES, WHEELS, FUELS) and the weapon/support split, but the floor for what drops is significantly higher, and the chance of pulling Epic or Legendary-tier output jumps in a way that even a stacked 4x Luck window cannot replicate consistently.
For most players, that translates into three practical wins: the higher floor on each Gold Roll means a typical 50-pull farming session at the CAR PARTS machine yields roughly 3-4x the Epic/legendary-tier drops compared to a standard roll under 4x Luck, which directly reduces the dependency on rerolling for a single 2,500-meter Elite Boss chassis, and even mid-game players running a single-point skill into the Gold Roll branch can feel the impact after their first bank cycle.
-
Fewer wasted rolls — the parts you receive are immediately usable, which means less bank pressure when you finally hit the 2,500-meter mark and need a real chassis.
-
Faster blueprint completion — because rare parts arrive in single pulls, the path to finishing a Blueprint for a top-tier vehicle (covered in detail in the Build and Kill Zombies best weapon coverage) shortens dramatically.
-
Cleaner inventory — you stop filling your bank with duplicate Commons that you will never equip, and your reroll pressure at the machine drops noticeably.
Why It Sits at the End of the Tree
The dev team at Zombie Car Crusher placed Gold Roll deep in the skill tree because, on a fresh save, it would completely break the early economy. New players need to learn how Luck, Reroll, and the daily free rolls interact, and skipping straight to a guaranteed-rarity pull removes the natural feedback loop that teaches you which categories actually matter for the car you are trying to build. By gating Gold Roll behind cheaper, more universally useful passives (More Support, Luck 1, Luck 2, Cash multipliers), the developers force you to engage with the full system before handing you the shortcut.
The trade-off is real: by the time you can afford to look at Gold Roll, you have probably already spent several hundred thousand in-game cash on other permanent upgrades, and the marginal value of each new skill starts to drop. That is exactly why the path planning in the next sections matters more than the actual final cost of Gold Roll itself.
Skill Cost Breakdown: What Gold Roll Actually Costs
The Build and Kill Zombies skill cost curve is steeper than most community guides admit, because the prices you see in patch notes are the base cost and the actual total includes every prerequisite node you have to clear first. According to community data pulled from current servers, the cost of reaching Gold Roll is best understood as a chain of three buckets rather than a single line item.
According to a detailed video breakdown of the Gold Roll skill, the ability summons a "golden zombie" companion that automatically targets the nearest enemy, deals damage on a short internal cooldown, and grants bonus gold per kill, with its damage and gold bonus scaling up at each upgrade level.
The Three Cost Buckets
| Cost Bucket | What It Includes | Approx. Cash (Reported) | When to Spend |
|---|---|---|---|
| Prerequisite passives | Luck 1, Luck 2, More Support, More Support 2, Cash bonuses | ~120K-180K | First 5-8 hours of play |
| Mid-tree multipliers | Distance cash %, boss damage, fuel efficiency | ~250K-400K | After first 2,500m run |
| Gold Roll + its node | The final unlock plus any adjacent node you must take | ~350K-600K | Late mid-game, once cash flow is stable |
Players consistently report that the gold roll skill cost itself — the single purchase — sits somewhere between 150K and 300K depending on whether the September 2026 patch rebalanced the tree, but the prerequisite spend is what determines when you can even click the button.
How Cash Flow Affects When You Can Afford It
The base income rate in Build and Kill Zombies scales with distance traveled, cash multipliers, and the 2x Cash game pass, so the same nominal skill cost feels wildly different to a player running a bare chassis with a Tier 1 engine versus someone stacking the 2x Cash pass plus a heavy car build with full Luck. As a rule of thumb reported by veteran players, if you can clear the 2,500-meter mark reliably and bank at least 80K-100K per run, the full Gold Roll unlock path is roughly one good session away. If you are still dying at wave 8, the same path is closer to a full weekend grind.
Hidden Costs Most Players Miss
Two costs hide inside the skill tree that are easy to overlook on a first read. The first is the token sink — the Reroll tokens you burn while grinding toward Gold Roll are functionally part of the cost, because every reroll is a pull you paid for in cash at the roll machine. The second is the opportunity cost of not having those points in higher-Cash passives during the time you are still saving up. A player who buys Gold Roll at minute 40 of their save file has effectively delayed the cash bonuses that would have funded faster progress in the first place.
Buying and Upgrading Skills
Understanding the Build and kill zombies how to get skills loop is straightforward once you know where the UI lives, but the upgrade flow has a few hidden rules that catch new players. Skills are earned with in-game cash only — there is no XP bar, no quest reward, and no Robux shortcut to a fully maxed tree. Every point you place comes out of the same wallet that funds your rolls, which is the central tension behind Build and kill zombies how to upgrade skills efficiently.
| Skill source | Cost type | Caps / requirements | Effect on the Gold Roll loop |
|---|---|---|---|
| Base skill node (early tree) | In-game cash only | None beyond cumulative spend | Unlocks the next tier of permanent nodes; no direct roll boost |
| Mid-tree damage / HP node | In-game cash only | Must own the previous node | Higher per-run cash → faster wallet refill → more Roll attempts per session |
| Luck node (pre-Gold Roll) | In-game cash only | 1-point-per-step prerequisite chain | Reshapes rarity spread on every Roll; reduces Common BLOCKS / ENGINES output |
| Gold Roll node (end of tree) | In-game cash only | Requires all earlier nodes in its branch to be maxed | Unlocks the advanced Roll interface — does NOT cost Robux, does NOT bypass the cash wallet |
| Hidden rule: shared wallet | Same pool as Roll purchases | No separate currency | Every skill point spent is one fewer Roll you can afford that lobby visit |
The Skill Tree UI Walkthrough
Open the skill tree from the lobby by clicking the Skills button in the bottom-right toolbar. The tree renders as a node graph with branches for Cash, Luck, More Support, Distance, and the final Gold Roll cluster. Each node shows its current level, its cap (most cap at 3 or 5), the cash cost of the next level, and a short tooltip describing what the passive actually does.
The interaction model is dead simple: click a node, confirm the purchase, and the level number ticks up. There is no animation delay and no confirmation prompt by default, so misclicks do happen. Most players enable the in-game confirmation toggle in settings during their first session to avoid accidentally spending 200K on the wrong node.
Where the Cash Comes From
The cash you spend on skills comes from three sources, ranked by reliability: passive chest ticks you collect between runs, the end-of-run distance payout scaling with how far your car survived, and one-time event drops like the King 1x1x1x1 bonus from the Hacker Event 2026. Because the Gold Roll node costs climb steeply past tier 3, plan your early gold spend around whether your current farming pattern reliably hits each of these three income streams before you commit to a permanent upgrade.
-
Run distance rewards — the farther you drive before the car dies or runs out of fuel, the larger the end-of-run cash payout. This is your bread and butter.
-
Boss kill bonuses — the King 1x1x1x1 fight during the Hacker Event 2026 drops a one-time large cash bundle plus recurring small drops on each subsequent kill.
-
Free Chest claims — the lobby Free Chest ticks up a small cash amount every few minutes and pays out when you claim it, which is enough to fund a single low-tier skill node if you bank it consistently.
The Actual Upgrade Loop
The Build and kill zombies how to upgrade skills loop in practice looks like this: launch a run, push as far as your current car can survive, bank the payout, return to the lobby, walk to the skill tree, and dump everything into the cheapest unowned node you can afford. The mistake most players make is trying to save for a specific expensive node before buying anything else, which leaves cash sitting in their wallet and earning nothing. The skill tree is a permanent layer, so every node you buy keeps paying you back for the rest of your save file.
Build and Kill Zombies Permanent Upgrades: What to Max First
The Build and kill zombies permanent upgrades system is the single biggest lever you have over your long-term progression speed, and the order you max things in matters more than the absolute amount of cash you spend. Most players who stall out do so because they spread points too thin across too many branches, then never have enough in any single branch to feel a real power spike.
The Cheapest Max Order
| Priority | Skill Node | Why Max It First |
|---|---|---|
| 1 | More Support | Adds an extra weapon/support slot, so every car you build becomes more dangerous without extra rolls. |
| 2 | Cash 1 → Cash 3 | Multiplies your per-run payout, which funds every other node faster. |
| 3 | Luck 1 → Luck 3 | Pushes the rarity spread on every roll upward, so your Common-fuel-tank waste drops. |
| 4 | More Support 2 | Second support slot unlock, again widening build variety without any new parts. |
| 5 | Luck 4 → Luck 5 | Late-game push to keep rare drops consistent once the rest of the tree is funded. |
| 6 | Gold Roll | The final goal — only buy once the cheaper nodes are all maxed. |
What to Upgrade First When Cash Is Tight
If you are sitting on less than 50K and trying to figure out the single best node to take, the answer is almost always More Support 1. The reason is mechanical: an extra support slot means every car you build in the lobby, even a starter chassis with mismatched parts, can mount a second weapon or defensive piece, which directly increases the distance you can clear in your next run. Higher distance means higher cash payout, which means the next node becomes affordable faster. The feedback loop is the whole point of the permanent layer.
Players who instead buy a single Luck point first usually regret it in the first 10 minutes, because a +1 Luck node on its own barely moves the rarity spread unless you stack it with 2x or 4x Luck server buffs. The support slot, by contrast, is a binary unlock — you either have it or you do not, and the moment you do, every run that follows gets easier.
Gold Roll Mistakes That Stall the Permanent Layer
Three mistakes account for the majority of stuck saves when grinding toward the Gold Roll skill node, and each one breaks the permanent skill layer's snowball effect in a different way — from spending order errors at the Cash passive branch, to skipping Luck entirely, to redirecting Robux into cosmetic game passes before the build and kill zombies permanent upgrades tree is even half-funded.
-
Buying high-cost nodes before cheap multipliers — players who try to jump straight to Gold Roll without first maxing Cash passives are essentially spending tomorrow's income today, because the run that would have funded the next three nodes instead funds one.
-
Ignoring the Luck tree entirely — Luck feels optional until you actually compare two side-by-side rolls at the CAR PARTS machine, at which point the rarity gap becomes obvious. The full Build and Kill Zombies luck mechanics breakdown walks through how the stat actually multiplies into your pull table.
-
Spending on cosmetic game passes before the skill tree — the 2x Cash pass is genuinely good, but buying it before your permanent skill layer is funded delays every other upgrade by hours. The pass should come last, not first.
Mapping the Cheapest Path to Gold Roll
Once you have decided to commit to the full unlock, the path planning matters because the tree has some prerequisite connections that are not obvious from the tooltip text. A node may show as affordable, but if its upstream node is not yet purchased, the unlock simply will not register. This is the most common reason players report "I have 300K cash and Gold Roll still won't unlock."
Prerequisite Chain in Practice
The chain reported by current players looks roughly like this: most progression routes begin with the three Cash 1-3 nodes, since early gold income determines how fast every downstream skill in the Gold Roll path becomes affordable, then layer Luck 1-3 to boost tier drops, then slot in More Support 1-2 to widen the multiplier pool, and only afterward reach the cluster unlocks feeding the final Gold Roll node.
Cash 1 → Cash 2 → Cash 3 ↓ Luck 1 → Luck 2 → Luck 3 ↓ More Support 1 → More Support 2 ↓ Adjacent cluster unlocks (fuel efficiency, distance bonus) ↓ Gold Roll (final node) — note that the early Cash 1-3 tier alone typically runs into the low six figures in cumulative gold on a fresh save, so many players gate the rest of the chain behind a short passive-farming loop (idle wave clears or a single long round) before committing to Luck 1-3, since the Luck tier's tier-drop bonus only pays off if your Cash income can sustain the next buy; the More Support 1-2 node then expands the multiplier pool to 3+ active buffs, which is what the cluster-unlock "fuel efficiency" and "distance bonus" neighbors feed into, and only that combined setup makes the final Gold Roll node's 2x–3x score output actually meaningful at end-of-round.
Each arrow means "must be owned before the next will register," even if the next node shows a green affordable number. The full Build and Kill Zombies skill tree order guide maps the exact layout with screenshot callouts, but the takeaway for cash planning is simple: the cheapest path is to walk the tree left to right and bottom to top, never jumping to a far node because the cash number looks tempting.
How Long the Path Actually Takes
For a fresh save with no game passes, the community-reported timeline to a fully unlocked Gold Roll sits around 12-20 hours of active play, spread across roughly 30-50 runs. Players with the 2x Cash pass can cut that in half. Players chasing the Hacker Event 2026 boss kills can compress it further, because the King 1x1x1x1 drop is one of the largest single cash injections in the game.
If you are trying to decide whether to commit cash to Gold Roll or to a different late-game passive like the Build and kill zombies best skill path for boss damage, the answer depends on what is bottlenecking your runs. If you keep dying because your car is too weak, push More Support and the cash multipliers first. If you keep dying because your weapons are anemic, push the weapon support passives and check the Build and Kill Zombies should I buy more support analysis for the specific trade-off math.
When to Walk Away From the Gold Roll Goal
There is one scenario where saving for Gold Roll is the wrong call: if the Hacker Event 2026 is in its final 48 hours and you have not yet killed the King 1x1x1x1 boss even once, dump every spare cash point into the cash multipliers and boss damage passives instead. The event rewards and badges are time-limited, and they convert into permanent value faster than a future Gold Roll unlock will. The full event window logic and badge list is covered elsewhere, but the rule of thumb is that limited-time content always outranks a tree node you can buy next week.
Practical Spending Rules and Final Takeaways
The Build and kill zombies best skill path is less about hitting a specific order and more about respecting three rules that veteran players tend to converge on after a few hundred hours of play. None of these rules are hidden, but they are easy to forget when a flashy new node shows up in the tree with an attractive icon.
The Three Rules
-
Max the cheap nodes first, every session. If a node costs less than 20K and you have not bought it yet, buy it before doing anything else. Small nodes compound.
-
Never save for a specific node you cannot afford yet. Cash in your wallet earns zero interest in this game, while cash in the tree earns you permanent income. Spend down to roughly 10K-15K reserve and then bank for the next tier.
-
Treat Gold Roll as a milestone, not a goal. The path to Gold Roll is where the actual power comes from — the multipliers, the support slots, the Luck stacking. The Gold Roll node itself is a clean finish line, but you will feel almost all of the benefit before you click it.
What This Means for Your Save File
If you take nothing else from this guide, the single most important thing to internalize is that the Build and kill zombies gold roll skill is the natural endpoint of a long chain of small permanent upgrades, and the order you walk that chain determines whether your save file feels slow or snappy by hour 10. Players who walk the tree left to right and bottom to top, maxing cheap nodes first, almost always report reaching Gold Roll faster than players who try to plan a "perfect" path and then save forever. The skill cost is high but it is also the easiest cost in the game to predict, because nothing in the tree scales with the live patch the way boss damage values or roll machine drop tables do.
The final piece of the puzzle is the daily free roll and the Free Chest — both feed cash back into the tree without any extra effort, so claiming them on cooldown is the cheapest insurance you have against the long Gold Roll grind. Once the final node unlocks, the entire roll economy reshapes around you, and the same chassis you were struggling to clear wave 12 with suddenly starts pulling Legendary parts in single pulls. That is the moment the permanent layer pays for itself, and it is the reason every serious player in the community treats Gold Roll as a "when, not if" purchase.
Frequently Asked Questions
What is the Build and Kill Zombies gold roll skill cost in current patch?
According to community data, the final Gold Roll node costs roughly 150K-300K in-game cash, but the total cost including all prerequisite nodes runs 350K-600K depending on your current tree state. The September 2026 patch rebalanced several adjacent nodes, so exact numbers may shift slightly with future updates.
How do I get skills in Build and Kill Zombies without spending Robux?
Skills are purchased exclusively with in-game cash earned from run distance, boss kills, and Free Chest claims. There is no Robux shortcut, and there is no XP system — every point you place comes directly from your banked cash. The cheapest source is stacking your run distance with the 2x Cash pass once your tree is mature.
What should I upgrade first in Build and Kill Zombies as a new player?
The first node to buy is always More Support, because an extra support slot makes every car you build more dangerous, which pushes your run distance higher, which funds your next node faster. Cash multipliers and Luck 1 should follow immediately after, in that order.
Is the Build and Kill Zombies best skill path the same for solo and co-op?
The core path is identical, but co-op players can delay Gold Roll slightly longer because two players pulling at the same roll machine effectively double the rare-part rate. Solo players should push toward Gold Roll faster, because a single-player session relies entirely on your own pull quality to fill the bank with usable parts.
Can I reset my Build and Kill Zombies skills if I mess up the order?
Yes, the game offers a free skill reset option once per save file, and a paid reset (using in-game cash, not Robux) afterward. Most players never need it because the cheap-max-first order works for almost every playstyle, but the option exists for players who want to experiment with a Luck-heavy or Cash-heavy build after a few weeks of play.