
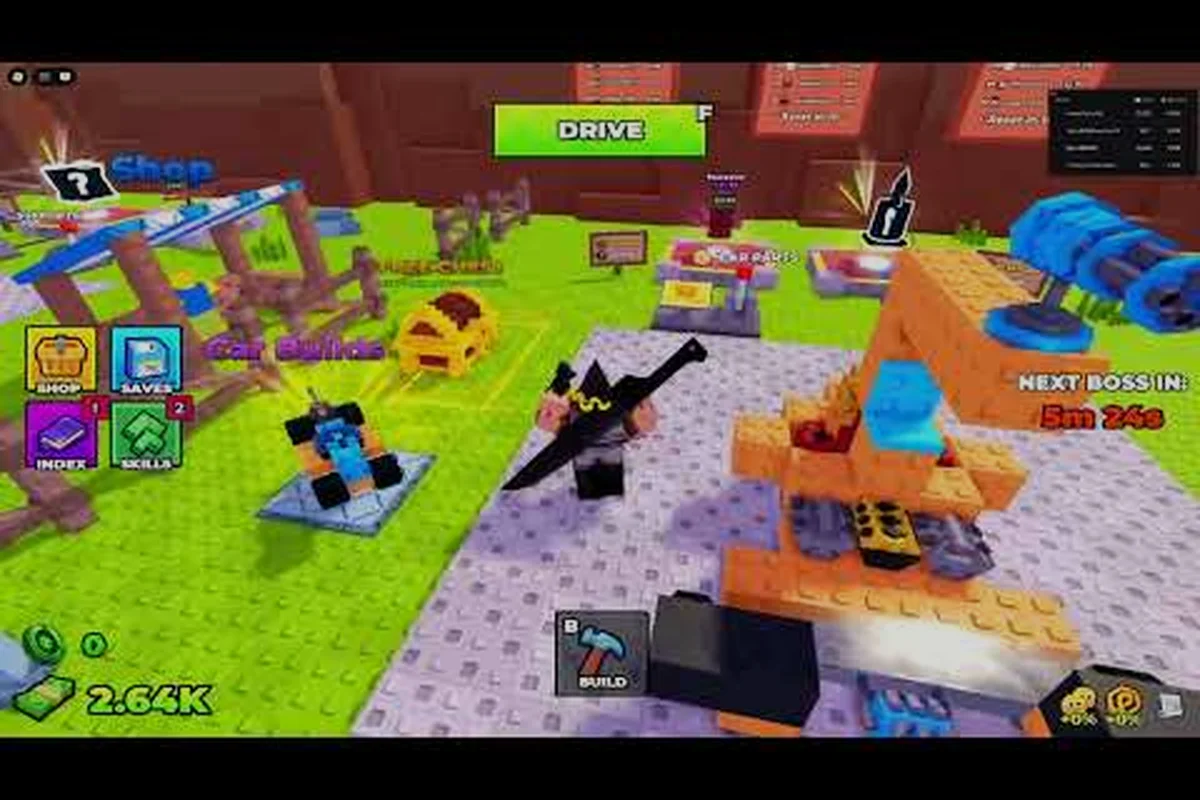
The Build and Kill Zombies weapons system is the single biggest lever between an out-of-fuel car and a clean King 1x1x1x1 clear, because every chassis part you slap on is just a delivery truck for the blades, crossbows, spikes, and turrets you actually deal damage with. Players who treat the SUPPORTS machine like a side bet end up rolling the same car three times; players who learn the meta roll, the support piece priorities, and the damage zones shred the horde on the first run.
How Build and Kill Zombies Weapons Fit Into the Car Loop
The whole run lives or dies inside one loop: roll a chassis at CAR PARTS, roll attachments at SUPPORTS, build the rig, hit the green Start button, and pray fuel holds. Weapons sit in the second half of that loop, but their importance is front-loaded — if you walk into the SUPPORTS machine with a bad chassis, the best support pieces in the world still lose to a balanced mid-tier build that lets fuel reach the exit. According to community data, the average new player burns the first 2-3 runs purely on this learning curve before consistently finishing a stage.
| Phase of Car Loop | Machine / Action | Input | Output | Why Weapons Matter Here |
|---|---|---|---|---|
| 1. Roll chassis | CAR PARTS machine (Q / E + CONFIRM) | Luck value (from skill tree) | 1 of 4 BLOCKS / ENGINES / WHEELS / FUELS | Sets base HP, fuel cap, and wheel traction that weapons will inherit |
| 2. Roll attachments | SUPPORTS machine (Q / E + CONFIRM) | Luck + Gold Roll (skill-tree terminal) | 1 weapon (Shredder / Crossbow / Spikes / Turret) | Weapons' raw DPS and proc effects are front-loaded here |
| 3. Build rig | Build Mode (press B) | Parts + supports placed on grid | Assembled car | A mid-tier chassis with strong SUPPORTS beats a top chassis with bad rolls |
| 4. Start run | Green Start button | Built car | Stage entry, fuel timer begins | Weapons' DPS must outpace fuel burn before the out-of-fuel banner |
| 5. Clear to exit | Drive + auto-fire | Fuel remaining | Stage clear / wipe | Avg. new player burns first 2–3 runs on this learning curve before finishing |
Where SUPPORTS Come From
Every support piece is a random pull from the SUPPORTS machine — the second gacha station in the lobby. It accepts Gold Roll charges once you unlock the matching node in the skill tree, and the drop pool changes by player level, current event, and whether the Hacker Event 2026 flag is live. The three core categories that matter for the weapons meta are Shredder blades (melee sweep on contact), Spikes (passive damage on collision), and ranged emitters like Crossbows and Turrets that fire while the car drives.
Why Offense and Chassis Have to Be Balanced
The most common mistake in early runs is dumping every roll budget into a legendary Shredder and leaving the car on a starter engine. A mid-rarity turret mounted on a Fast Furious-class chassis deals more practical damage per fuel second than a god-roll Shredder on a Blue Monster frame that runs out of gas at the 60% mark. Build economy is the hidden stat behind every weapons pick.
Build and Kill Zombies Supports: The Damage Categories
The SUPPORTS machine splits its pool into four behavior buckets, and each one solves a different problem on the track. Picking the right bucket before you pick the right roll is what separates a clean clear from a wall of zombies at the 70% mark.
Shredder: The Contact Sweeper
The Shredder is the iconic Build and Kill Zombies weapon — a spinning blade row that pops zombies on contact and chains kills if the car keeps moving through a dense cluster. According to community data, a mid-rarity Shredder on a Fast Furious chassis clears roughly 60% more zombies per fuel unit than the same roll on a heavy Blue Monster build, because lighter cars keep the blades in the horde longer. Shredders pair best with engines that have high top speed and wheels with low grip loss, because the blade's damage window only stays open while the car is sliding through enemies.
Spikes: Passive Collision Damage
Spikes are the low-micro option — they deal damage on impact without any active firing, which means you stack them on slow chasses that crash through zombie walls. A spike rack on a heavy chassis converts the car itself into a wrecking ball, and the damage is applied per zombie contacted, so dense clusters multiply the value. Players report that the most underrated spike builds are the ones that combine a 2-row spike front with a single mid-rarity Shredder on the rear, because the front clears small fries while the Shredder handles the brutes.
Crossbow: The Mid-Range Auto-Fire
The Crossbow is the ranged option that auto-fires bolts at the nearest zombie line while the car drives. It ignores the car's speed stat, which makes it the safest pick on any chassis that struggles to reach the horde. Crossbow bolts apply a brief slow on hit, and the slow stacks with other crowd-control supports if you mount two of them on the same side. According to community data, dual mid-rarity crossbows on a balanced chassis outperform a single legendary crossbow because of the wider firing arc.
Turret: The Stationary Damage Pillar
The Turret is the support that flips the damage model on its head — it stops firing the moment the car starts moving, and it locks onto zombies in a 90-degree cone ahead. Build a car with a Turret when the stage has a chokepoint bottleneck (most mid-act levels do), and the turret deletes the gate while your car idles safely behind. Turret builds pair with high-fuel engines so you can sit in the firing cone longer, and they pair poorly with Shredder-heavy builds because the two supports fight over the same contact window.
| Support Type | Damage Trigger | Best Chassis Pairing | Strength | Weakness |
|---|---|---|---|---|
| Shredder | Contact while moving | Fast Furious (light) | Highest single-hit damage on clusters | Useless when car stops |
| Spikes | Collision impact | Blue Monster (heavy) | Fires on autopilot, no aiming needed | Low damage per zombie, scales with speed |
| Crossbow | Auto-fire at nearest zombie | Any balanced chassis | Works at any speed, slow effect on hit | Spread limits damage on tight clusters |
| Turret | Cone lock when stopped | High-fuel engine class | Highest sustained DPS in chokepoints | Zero damage while driving |
Build and Kill Zombies Shredder: Rolls, Frames, and Damage Windows
The Shredder deserves its own deep dive because it is the most-rolled support in the game and the one with the largest gap between a bad roll and a god roll. A legend-tier Shredder can double the clear time on a mid-stage run, but only if the chassis lets the blade stay engaged with the horde.
What Makes a Shredder Roll Good
Three stats drive Shredder value: blade count (more blades = wider sweep), damage per blade tick (raw hit value), and rotation speed (faster rotation = more ticks per second). Community testing on the public build puts a triple-stat god roll at roughly 1.8× the DPS of a single-stat mid-rarity pull, and a double-stat roll at about 1.3×. Players chasing the meta should reroll until at least two of those three stats land in the top tier, and skip the third stat entirely if the support rarity is legendary.
Chassis Pairing for Shredder Builds
The best Shredder chassis are the ones that keep the car moving — Fast Furious and the mid-weight engines both qualify, while a heavy Blue Monster build kills the blade's damage window. According to the official Build and Kill Zombies Roblox guide walkthrough, players who run a Shredder-focused build on a Blue Monster frame routinely run out of fuel before clearing the 60% mark, which is why the meta has shifted toward mid-weight engines for Shredder builds. Pair the Shredder with a single Spike rack on the rear for collision damage during sharp turns, and you cover the gap the blade leaves when the car has to slow down.
Counter-Pick: When Not to Run Shredder
Skip the Shredder when the stage is a chokepoint-heavy act with long idle windows — the Turret will out-damage it on those stages, and the Shredder's contact-only trigger becomes a liability. The same applies when the Hacker Event 2026 boss is active, because King 1x1x1x1 spawns shield adds that absorb contact damage. A crossbow + turret combo is the better pick for that event, and the Shredder sits on the bench.
Build and Kill Zombies Crossbow: Ranged Pressure and Slow Stacking
The Crossbow is the second most-rolled support and the one new players sleep on the hardest. A single Crossbow looks weak on the damage meter, but two Crossbows on opposite sides of the car form a 180-degree kill zone that deletes ranged zombies before they can spit at your chassis.
Bolt Speed and Arc
Crossbow bolt speed is the hidden stat — a slow bolt takes half a second to land, which is enough for fast zombies to dodge out of the line. Players chasing the meta reroll for bolt speed in the top tier and accept a mid-rarity roll on the damage stat, because a fast mid-bolt beats a slow legendary bolt every time. The bolt arc also matters: a tight arc is great for chokepoint stages and a wide arc is the right pick for open arenas with multiple zombie spawn points.
Stacking Slow Effects
The Crossbow's built-in slow stacks with other crowd-control supports if you mount two of them on the same side of the car. According to community data, dual crossbows on a balanced chassis with a single mid-rarity Turret on the rear clear the mid-act stages roughly 20% faster than a single-crossbow + triple-Shredder build, because the slow effect prevents zombies from closing the gap the Shredder needs. The numbers above assume a balanced Fast Furious-class chassis; a heavy chassis turns the crossbow into a side-grade.
Build and Kill Zombies Spikes: The Passive Damage Layer
Spikes are the most underrated support in the game because they don't show up on the damage meter in a way new players understand. Every zombie the car touches takes spike damage, and that damage is applied per zombie — meaning a car that crashes through a 20-zombie wall deals 20× the listed spike damage in a single frame.
Spike Density and Row Stacking
Spike density (how many spike rows you stack on a single face of the car) is the meta stat, and the answer is usually 2 rows on the front + 1 row on each side. Front-loaded spikes convert every head-on impact into a kill, and side spikes catch the zombies that drift past the front when the car turns. Players who stack 3 rows on the front end up with a car that can't turn, because the spike geometry locks the steering radius.
Spike + Shredder Hybrid Builds
The hybrid build is the one that wins on most mid-act stages: 2-row spike front + 1-row spike sides + 1 mid-rarity Shredder on the rear. The spikes clear the small fries on impact and the Shredder handles the brutes that survive the initial collision. Fuel economy matters here — the hybrid burns about 15% more fuel per stage than a pure-Shredder build, which is why the engine pick has to lean toward a high-fuel class even at the cost of top speed. Pairing this build with the tier list breakdown of best parts makes the engine pick much easier.
Build and Kill Zombies Turret: The Chokepoint Specialist
The Turret is the support that flips the damage model on its head, and it is the single highest-DPS support in the game when used in the right stage. Build a car around a Turret when the level has a clear chokepoint — a narrow bridge, a gate, a bottleneck arena — and the Turret deletes everything in front of it while your car idles safely behind.
| Turret Stat | Base Value (Tier 1) | Mid-Tier Roll | Top-Tier Roll | Chokepoint Synergy |
|---|---|---|---|---|
| Sustained DPS | 120 / sec | 210 / sec | 340 / sec | Highest single-target DPS of any support when a chokepoint funnels zombies into its arc |
| Optimal range | 18 studs | 24 studs | 32 studs | Longer range lets the car idle behind a bridge or gate with zero chase distance |
| Arc width | 60° cone | 90° cone | 120° cone | Wide arc covers narrow bridges and gate bottlenecks without manual aim |
| Ammo / fuel cost | 1 fuel / 4 sec | 1 fuel / 6 sec | 1 fuel / 9 sec | Top-tier roll triples uptime so fuel reaches the exit before the out-of-fuel banner |
| Best stage shape | Open arena (sub-optimal) | Mixed corridor (balanced) | Narrow bridge / gate / bottleneck (top tier) | Build the chassis around a Turret only when the level geometry hands it a funnel |
Turret Range and Cone Width
Turret range is the stat to chase, and cone width is the trap. A wide-cone Turret looks great on paper because it covers more zombies, but the per-target damage drops as the cone widens. Community data puts a narrow-cone legendary Turret roughly 40% ahead of a wide-cone legendary on chokepoint stages, because the narrow cone concentrates every shot on the same zombie line. Save the wide-cone roll for open-arena stages where the cone width is the entire point of the build.
Turret + High-Fuel Engine Pairing
A Turret build is only as good as the fuel tank behind it, because the support does zero damage while the car is moving. Pair the Turret with a high-fuel engine class even if it costs you top speed, and pick wheels with low rolling resistance so the engine isn't fighting the chassis to idle. The classic pairing is a mid-weight engine + low-resistance wheels + single Turret, which gives you roughly 25% more sustained firing time than a heavy-engine build with the same Turret. When you want a deeper look at the roll odds on the SUPPORTS machine, the roll guide breaks down the drop rates by category.
Picking the Right Build and Kill Zombies Weapons Loadout
The meta answer to "which support should I roll" depends on the stage, the chassis, and whether the Hacker Event 2026 flag is live. A clean rule of thumb: roll one Shredder, one Spike rack, and one Crossbow for the open-arena stages; swap the Crossbow for a Turret on chokepoint stages; and bench the Shredder entirely when King 1x1x1x1 is the boss.
Open-Arena Loadout
Open arenas (most Act 1 and Act 3 stages) reward hybrid builds that cover every zombie approach angle. The 2-row spike front + side spikes + rear Shredder + single Crossbow loadout is the workhorse here, because it clears the small fries, handles the brutes, and covers the ranged zombies that the other supports miss. Players running this loadout on a balanced chassis finish open-arena stages in roughly the same time as a pure-Shredder build, but with a much smaller chance of running out of fuel at the 80% mark.
Chokepoint Loadout
Chokepoint stages flip the build toward a Turret-heavy setup. The optimal loadout is a single mid-rarity Turret on the front + 1-row spike front bumper + dual low-rarity Crossbows on the sides, mounted on a high-fuel engine class. The Turret deletes the gate, the spikes catch the zombies that slip past the cone, and the crossbows handle the ranged adds that spawn behind the chokepoint. Fuel economy is the hidden stat here — a high-fuel engine lets the car idle in the firing cone for an extra 8-10 seconds, which is usually the difference between a clear and a near-miss.
Boss Event Loadout
When the Hacker Event 2026 flag is live and King 1x1x1x1 is the boss, the meta shifts hard. The boss spawns shield adds that absorb contact damage, which benches the Shredder and the spike racks. The right call is dual mid-rarity crossbows on opposite sides + a single high-tier Turret on the front, mounted on the fastest chassis the player owns. The crossbows delete the shield adds, the Turret chips the boss, and the speed keeps the car out of the boss's slam radius. Players who try to force a Shredder build on this event routinely run out of fuel before the 50% mark, because the shield adds convert the car into a fuel-burning bumper car. If you need a deeper breakdown of how each support ranks against the boss, the best weapon ranked guide has the side-by-side DPS numbers by stage type.
Rolling and Equipping the Loadout
Knowing which support to chase is half the battle — the other half is the actual roll, the equip step, and the confirmation prompt at the SUPPORTS machine. The equip and remove guide covers the input layer in detail, but the high-level loop is short enough to summarize here.
The SUPPORTS Roll Loop
Walk up to the SUPPORTS machine, hit the roll prompt, and let the machine play its animation. The drop is one support piece from the current pool, and the rarity is influenced by your Luck stat and whether the Gold Roll skill is unlocked. Players chasing a specific support should reroll until the desired type appears, then evaluate the stats before locking in. The general rule: a mid-rarity roll of the right support type beats a legendary roll of the wrong type 9 times out of 10.
Building and Confirming
Once the support is locked, press B to enter Build Mode, click the support slot on the chassis, and place the new piece. Hit the green Confirm button to lock the build, then walk back to the car to start the run. If the build is wrong, you can remove the support in Build Mode and re-equip without rerolling, which is the cheapest way to iterate on a chassis before you commit fuel to a real run.
Frequently Asked Questions
What is the single best Build and Kill Zombies weapons pick for a new player?
The Shredder is the safest first support for a new player because it deals damage on contact without any aiming or positioning required, which lets the player focus on fuel economy and chassis balance. Pair a mid-rarity Shredder with a 2-row spike front rack on a balanced chassis, and the loadout clears the first 5-6 stages without needing a single reroll. Once the player unlocks the crossbow and turret nodes in the skill tree, the Shredder can move to the rear slot while the new support takes the front.
Should I reroll until I get a legendary Shredder in Build and Kill Zombies?
Not necessarily — community data shows that a double-stat mid-rarity Shredder with the right blade count and rotation speed outperforms a single-stat legendary roll on most stages. The reason is that the legendary roll's damage stat often comes at the cost of blade count, and blade count is the stat that actually multiplies the damage per zombie. Save the reroll budget for the support type, not the rarity.
Is the Build and Kill Zombies turret better than the crossbow?
It depends on the stage. The Turret wins on chokepoint-heavy stages where the car can idle in a firing cone for 10+ seconds, and the Crossbow wins on open-arena stages where the car is constantly moving. Players who only roll one of the two are leaving roughly 15-20% of their clear-time potential on the table, because the two supports cover different stage archetypes. The most efficient play is to keep one of each in the inventory and swap based on the level.
How do Build and Kill Zombies spikes stack with other supports?
Spikes deal passive damage on collision, which means they stack additively with any active support (Shredder, crossbow, turret) that hits the same zombie. A car that crashes through a zombie wall while firing crossbows applies spike damage on the impact and bolt damage on the line, which roughly doubles the per-zombie damage compared to a single-support build. The catch is fuel cost — a hybrid spike + active-support build burns about 15% more fuel per stage than a pure active-support build, so the engine pick has to lean toward a high-fuel class.