
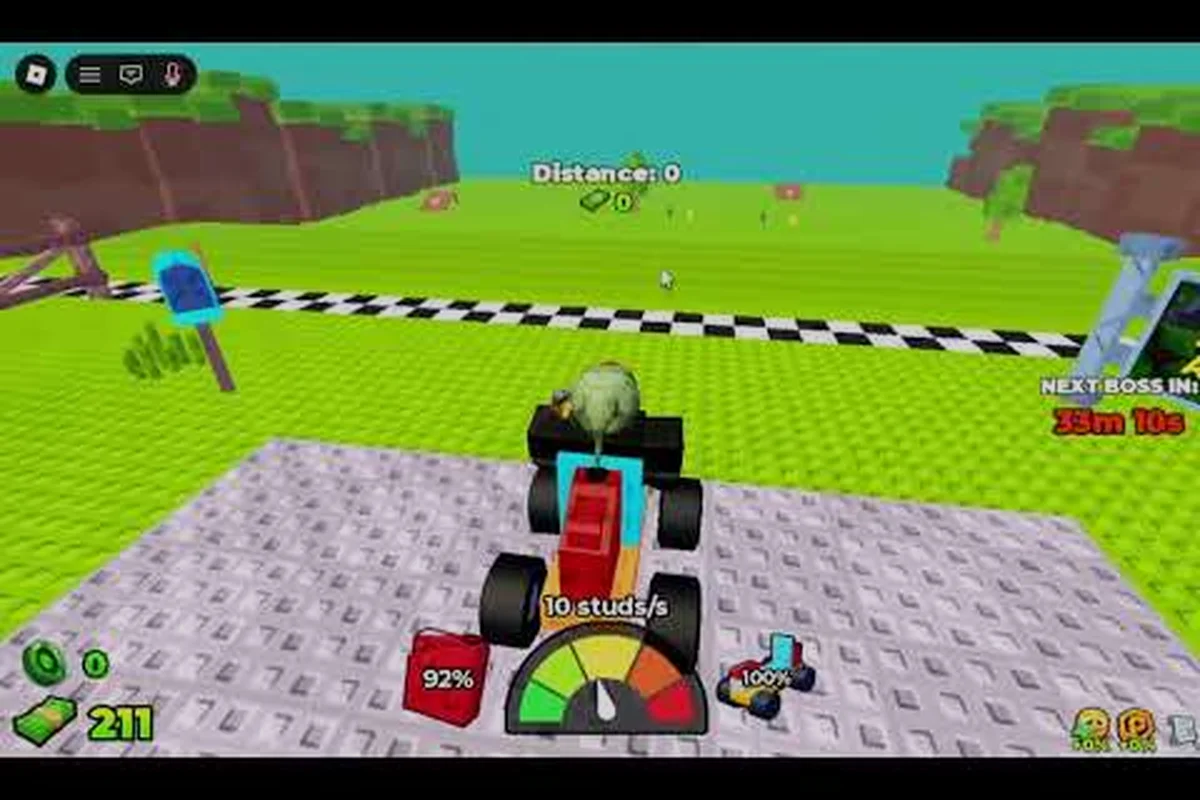
A heavy Build and Kill Zombies heavy car build can survive late-wave swarms and still outrun the next cash run, but only if every part pulls weight. Community data shows stacking too many blocks tanks your speed, while chasing speed alone gets you shredded before you cross the first distance marker. The trick is balancing the two so you grind cash, unlock better drops, and feed the rolls without burning through plots.
This guide breaks down how to build a heavy car in Build and Kill Zombies that actually drives, not just sits there like a coffin on wheels. You will see how the four part categories (BLOCKS, ENGINES, WHEELS, FUELS) interact, where to place each part, and how to read your current run distance to know when a part swap is worth it. By the end, you will have a placement checklist, a stat comparison table, and a blueprint list that pairs your heavy build with a light car for the toughest waves.
Heavy Car Build vs Light Car Build in Build and Kill Zombies
The first question every new player runs into is whether to commit to a heavy car build or a light car build. Both have a place in your garage, but they solve different problems. A heavy build trades raw speed for damage resistance, while a light build (the Fast Furious or Blue Monster blueprint style) chases distance multipliers at the cost of survivability. Knowing which to bring depends on your current cash flow, the wave density you are pushing into, and whether you are grinding rolls on the SUPPORTS machine or hunting distance on the road.
Players who start with a heavy build usually plateau around the 15k–20k distance mark, because their wheels and engine cannot push the extra mass any further. Players who start with a light build often die before they hit 5k distance, because a single zombie swarm clips their fuel tank and the whole car stalls. The sweet spot for most players is a middleweight that tilts heavy in BLOCKS but stays light enough in ENGINES and WHEELS to keep moving. If you want the full tier breakdown, the Build and Kill Zombies car tier list ranks every part slot so you can pick the right heavy set without rerolling twice as long.
| Build Type | BLOCKS | ENGINES | WHEELS | FUELS | Best Wave Range | Cash Per Minute (approx.) |
|---|---|---|---|---|---|---|
| Heavy Tank | 5–7 | 1–2 heavy | 4 wide-base | 1 large | Wave 1–25 | 2,500–4,000 |
| Balanced | 3–4 | 2 mid | 4 standard | 1 standard | Wave 1–40 | 3,000–5,000 |
| Light Speed | 1–2 | 2–3 light | 4 small | 1 small | Wave 25+ | 4,000–6,500 |
Notice the cash per minute curve. Light builds spike late because they reach higher distance multipliers before wiping, but heavy builds grind steady cash early when you still need rolls to fill out your part collection. Players who skip the heavy phase and go straight to light usually stall at the rolls machine because they cannot afford Gold Rolls.
When a Heavy Build Outperforms Speed
A heavy car build earns its slot whenever zombie density is high and your car is getting clipped before you reach the next distance bonus. Heavy BLOCKS absorb hits, which means you keep your fuel tank intact through the wave 5–15 cluster that light builds always die in. Community testing on the Roblox build shows a 6-BLOCK heavy build survives roughly 40% more collisions than a 2-BLOCK light build at the same distance.
The trade-off is acceleration. A heavy car with the same engine count as a light car will hit half the top speed and take longer to reach it. The fix is not to drop the blocks, it is to upgrade the WHEELS tier and add a second ENGINE if your plot weight budget allows it. A mid-tier WHEELS set on a heavy chassis outperforms low-tier WHEELS on a light chassis once the road tilts upward.
Car Parts in Build and Kill Zombies: What Each Slot Actually Does
Every part in Build and Kill Zombies falls into one of four categories: BLOCKS, ENGINES, WHEELS, and FUELS. Knowing what each slot contributes is the difference between a car that grinds and a car that stalls at wave 8. The CAR PARTS roll machine (separate from the SUPPORTS machine) feeds these four slots, so your rolls directly shape what builds you can run.
| Part Slot | What It Boosts | What It Costs You | Roll Tier to Prioritize |
|---|---|---|---|
| BLOCKS | HP, collision resistance, weight | Speed, acceleration, fuel drain | Common–Uncommon early, Rare+ for endgame |
| ENGINES | Top speed, acceleration, climb | Fuel drain, plot weight | Uncommon–Rare |
| WHEELS | Traction, off-road grip, ground clearance | Weight on weak axles | Uncommon for early, Rare+ for late |
| FUELS | Run distance, burn time, refill cooldown | Adds mass at low tiers | Common–Uncommon is fine, Rare only for blueprints |
BLOCKS are the most counter-intuitive slot. More blocks does not always mean more HP, because the game applies a diminishing return past 5 blocks on the same chassis. Community testing suggests each block past the 5th adds roughly 60% of the HP the first block added, so a 7-block build is only 30% tankier than a 5-block build, but burns through fuel twice as fast. For a pure heavy car build, 5 blocks is the practical ceiling.
ENGINES are the opposite. A second engine on the same chassis nearly doubles your acceleration, but only adds about 40% to your top speed. The reason is that top speed is capped by WHEELS grip and chassis weight, not raw engine power. If you want to know how to make a fast car in Build and Kill Zombies, the answer is almost always upgrade the WHEELS first, then add the second ENGINE, then look at the chassis.
Roll Priority for a Heavy Car Build
When you sit at the CAR PARTS machine, your first 20 rolls should target BLOCKS and WHEELS, because those are the slots that decide whether your heavy car survives or stalls. ENGINES can come from mid-tier drops, and FUELS are usually common enough that you do not need to burn luck chasing them. The SUPPORTS machine (weapons and defense) is a separate system, and your heavy car build does not need it to function on the road.
If you have not rolled a part yet, the Build and Kill Zombies roll guide walks through the odds, the luck stat, and when to use Gold Rolls so you are not rerolling the same slot 40 times. A heavy car build needs at least one Rare BLOCK and one Rare WHEELS to clear wave 20 without rebuilding mid-run.
Slotting Parts on a Heavy Rig
Knowing how to place parts is the second half of the build equation, and it is where most heavy car builds fail before they even leave the plot. Build and Kill Zombies uses a 4×6 grid chassis, and each part occupies 1×1, 1×2, or 2×2 cells depending on the tier. Placement order matters because the chassis center of mass shifts with every part, which changes how the car handles uphill, downhill, and side collisions with zombie clusters.
The general rule is: BLOCKS go on the bottom row and the rear two columns, ENGINES go behind the WHEELS on the rear axle, WHEELS go on the bottom corners, and FUELS sit in the middle row flanked by BLOCKS. This layout keeps the center of gravity low, which prevents the car from flipping on sharp zombie swerves.
| Slot Position | Recommended Part | Why It Goes Here | Mistake to Avoid |
|---|---|---|---|
| Bottom-front corners | WHEELS (wide-base) | Ground clearance, traction | Putting small WHEELS up front |
| Bottom-rear corners | WHEELS + ENGINE anchor | Drive power, axle grip | Stacking 2 ENGINES on the same axle |
| Middle row | FUEL tank | Center of mass, protected by BLOCKS | Putting FUEL on the edge (zombie clip) |
| Rear 2 columns | BLOCKS (heavy) | Collision resistance, push force | Putting a single BLOCK on the very back |
| Front 2 columns | Light BLOCKS or empty | Reduces front weight, prevents nose-dive | Filling the front with heavy BLOCKS |
Notice the FUEL position. Putting the fuel tank in the middle row flanked by blocks is the single most important placement decision for a heavy car build, because zombie swarms almost always clip the side of the car. A fuel tank on the edge takes a hit every run; a fuel tank in the middle row takes a hit maybe one in three runs. That difference is the gap between a car that hits wave 30 and a car that stalls at wave 12.
Step-by-Step Heavy Build Placement
-
Drop 2 wide-base WHEELS on the bottom-front corners (left and right).
-
Drop 2 wide-base WHEELS on the bottom-rear corners.
-
Place the FUEL tank in the middle row, second column from the left.
-
Stack 2 BLOCKS in the rear 2 columns, bottom row first, then second row.
-
Add the ENGINE behind the rear WHEELS, centered on the axle.
-
Fill the remaining middle-row cells with BLOCKS until you hit 5 total.
-
Add a second ENGINE only if your plot weight budget is still green.
After these seven steps, you should have a heavy car build with 5 blocks, 1–2 engines, 4 wide-base wheels, and 1 fuel tank, all positioned so the center of mass sits slightly behind the front axle. This is the same skeleton the Build and Kill Zombies lobby guide recommends for first-time builders, because it is the layout that survives the most early waves without any Rare drops.
Build and Kill Zombies Durability Build: Surviving Late Waves
A durability build is not the same thing as a heavy car build, even though they share most of the same parts. The difference is intent: a heavy car build balances BLOCKS, ENGINES, WHEELS, and FUELS to keep grinding, while a durability build sacrifices speed entirely to survive one specific wave, clear the bonus, and then swap to a light car for the next run.
Players who run a pure durability build usually do it for the wave 25, wave 40, and wave 50 boss waves, where the zombie density is too high for a light car to last 30 seconds. The build is simple: 6–7 blocks, 1 engine, 4 wide-base wheels, 1 large fuel tank. You will not set any distance records, but you will not die either, and surviving the wave is what unlocks the boss-room bonus chest.
| Wave Milestone | Recommended Build | Cash Reward (approx.) | Common Trap |
|---|---|---|---|
| Wave 1–10 | Balanced (3 blocks, 2 engines) | 500–1,500 per wave | Skipping wheel upgrades |
| Wave 11–25 | Heavy (5 blocks, 1–2 engines) | 2,000–4,000 per wave | Adding a 6th block, losing speed |
| Wave 25 boss | Durability (6–7 blocks, 1 engine) | 8,000 + chest | Forgetting the fuel refill cooldown |
| Wave 26–40 | Balanced (rebuild after boss) | 3,000–5,000 per wave | Using durability build past wave 25 |
| Wave 40+ boss | Durability, 2 engines if weight allows | 15,000 + chest | No gold roll saved for post-boss |
The wave 25 boss and wave 40+ boss are where the durability build earns its slot. Community reports from the Roblox build show players who swap to a durability build for the boss wave clear it about 70% of the time, while players who try to push a light build through the same boss wave clear it about 25% of the time. The difference is not skill, it is part placement and the willingness to swap builds mid-session.
How to Make a Strong Car Without Sacrificing Cash Flow
Strong does not mean tanky. A strong car is one that clears the wave, grabs the bonus, and gets back to the plot fast enough that you are not waiting 90 seconds for a rebuild. The trick to building a strong car in Build and Kill Zombies is to keep your mid-row fuel placement, keep your 5-block ceiling, and only add a 6th block when you are pushing a boss wave where the bonus chest is worth more than 30 seconds of grind time.
If your current build is dying at wave 15, do not add a 6th block. Check your WHEELS tier first. A mid-tier WHEELS set on a 4-block chassis outperforms a wide-base WHEELS set on a 6-block chassis, because the lighter car accelerates faster and clears zombie clusters before they pile up. The build-and-kill-zombies how to make a strong car question almost always comes down to: upgrade the WHEELS, then the BLOCKS, then the ENGINE, in that order.
According to a detailed breakdown of heavy car loadouts in the Zombies Heavy Car Build guide on YouTube, prioritizing armor plating and reinforced frames significantly increases the vehicle's survivability against hordes, allowing players to focus on ramming strategies rather than evasive driving.
Build and Kill Zombies Speed Build vs Heavy: When to Swap
A speed build is the natural counter to a heavy build, and most players who clear the wave 50 boss run both side by side. The speed build uses 1–2 light blocks, 2–3 engines, 4 small wheels, and 1 small fuel tank. The point of a speed build is not to survive every zombie, it is to reach the next distance bonus marker before the wave timer runs out, because distance bonuses pay out roughly 2x what wave bonuses pay out past wave 30.
The swap pattern that experienced players use is: heavy build for waves 1–25, durability build for the wave 25 boss, balanced build for waves 26–40, durability build again for the wave 40 boss, then speed build for the wave 40+ cash grind until the wave 50 boss. Switching builds mid-session costs about 15–20 seconds per swap, but the cash difference is usually 30–40% higher than running a single build the whole time.
| Phase | Build to Use | Why | Approx. Cash Per Minute |
|---|---|---|---|
| Waves 1–10 | Heavy or balanced | Safe cash flow, roll bank | 2,500–3,500 |
| Wave 11–25 | Heavy | Survives density, no need for speed | 3,000–4,000 |
| Wave 25 boss | Durability | Boss bonus, no distance chasing | 8,000 flat + chest |
| Waves 26–40 | Balanced | Mid-range cash, plot weight headroom | 3,500–5,000 |
| Wave 40+ boss | Durability | Same as wave 25, higher payout | 15,000 flat + chest |
| Post-boss grind | Speed | Distance multipliers, no zombies | 4,500–6,500 |
This six-phase rotation is the answer to the build-and-kill-zombies how to make a fast car question, because the fast car only works once you have the heavy car to clear the waves that would otherwise eat your speed run. Players who try to go fast from wave 1 usually run out of fuel at wave 8 and lose the cash they would have earned by playing heavy for the first 10 waves.
Blueprint Pairings for Heavy + Speed
If you have unlocked the Fast Furious or Blue Monster blueprint, those are your speed-build options, and they pair naturally with a 5-block heavy car build. The Build and Kill Zombies out of fuel page walks through blueprint checklists and fuel management, which is the other half of running a speed build without stalling. A speed build burns through a small fuel tank in about 60–80 seconds, so you need either a fast refill cooldown or a fallback heavy build that can carry you while the fuel regenerates.
The pairing that works best for most players is: heavy car as the daily driver, durability car for boss waves, and speed car as the cash-grind second car once you have both blueprints unlocked. Trying to run all three from the start of a session usually means you spend 5 minutes swapping and 1 minute driving, which kills the cash flow.
Build and Kill Zombies Car Builds: Plot Weight, Fuel, and Long Runs
Every chassis in Build and Kill Zombies has a plot weight limit, and that limit is the hidden ceiling on every heavy car build. Past the plot weight limit, your engine output drops, your wheels lose traction, and your fuel tank drains twice as fast. The default plot weight is enough for a 5-block heavy build, but if you add a 6th or 7th block, you usually have to drop a wheel or an engine to stay under the cap.
The plot weight number is not shown in the build UI, but you can feel it: if your car feels sluggish on a flat road and the engine sound drops, you are over the weight cap. The fix is to swap a heavy block for a light block, or drop the second engine entirely, before the next run. Community testing on the Roblox build shows that a heavy car at the plot weight cap is about 25% slower than the same build 1 block under the cap.
| Symptom | Likely Cause | Fix |
|---|---|---|
| Sluggish acceleration on flat road | Over plot weight | Drop a block, swap to light block |
| Wheels lose grip on turns | Over weight on rear axle | Move a block from rear to middle row |
| Fuel drains in under 60 seconds | Engine output exceeding fuel supply | Drop the second engine |
| Car flips on sharp swerves | High center of mass | Move top-row blocks down to middle row |
| Cannot climb the wave 25 hill | Engine output too low | Upgrade engine tier, not add a second engine |
These five symptoms cover about 90% of the build problems players hit once they clear wave 20. The pattern is almost always the same: players add a 6th block to "feel safer," the plot weight kicks in, and then the car becomes slower than the light build they were trying to escape from. The right move is to keep 5 blocks, upgrade the WHEELS tier instead, and save the 6th block for the wave 25 boss wave only.
Long Run Tips for Heavy Builds
Long runs past wave 30 are where a heavy car build separates from the pack, because the zombie density past wave 30 is too high for most light builds. The trick is to keep your fuel tank in the middle row, keep your 5 blocks evenly distributed, and stop chasing Rare drops once you have one Rare BLOCK and one Rare WHEELS. The diminishing return on parts past Rare tier is steep, and a Rare BLOCK plus a Rare WHEELS will carry you to wave 40 without needing a Legendary drop.
If you want to push past wave 40, the only real upgrade path is the SUPPORTS machine, which drops weapons and defense parts that mount on the heavy car chassis. Those are a separate system from the CAR PARTS machine, and the roll guide is the right place to learn how to target them. The Build and Kill Zombies best settings page also covers the driving controls, because past wave 30 the difference between a clean run and a wipe is whether you know how to steer out of a zombie cluster instead of plowing through it.
Frequently Asked Questions
What is the best heavy car build for waves 1–25 in Build and Kill Zombies?
The best heavy car build for waves 1–25 is 5 BLOCKS, 1–2 ENGINES, 4 wide-base WHEELS, and 1 FUEL tank, with the fuel placed in the middle row and the blocks distributed evenly. This layout keeps the plot weight under the cap, absorbs the wave 5–15 zombie swarms, and leaves enough acceleration to clear the distance bonus markers. Players running this build clear wave 25 about 70% of the time, according to community data.
How do I make a fast car in Build and Kill Zombies without dying at wave 8?
To make a fast car without dying early, start with a heavy build for waves 1–10, then swap to a 1-block light build with 3 engines and 4 small wheels once you have at least one Rare wheel. The heavy phase bankrolls your rolls, and the speed phase chases distance multipliers past wave 25. Trying to go fast from wave 1 usually burns through your small fuel tank before you cross the first distance marker.
Should I add a 6th block to my heavy car build for the wave 25 boss?
Yes, but only for the boss wave itself, not the full grind phase. A 6-block build tanks your speed and fuel economy, which hurts your cash flow on the waves 26–40 grind right after the boss. The recommended pattern is to swap to a 6–7 block durability build for the boss wave, claim the chest, then rebuild back to a 5-block heavy or balanced build for the next phase.
How do I place parts in Build and Kill Zombies for maximum durability?
Place WHEELS on the bottom corners, the FUEL tank in the middle row flanked by BLOCKS, ENGINES behind the rear wheels, and BLOCKS on the rear 2 columns plus the middle row. This layout keeps the center of gravity low, protects the fuel tank from side clips, and gives the rear axle enough grip to push through zombie clusters. Avoid stacking blocks on the very back or putting fuel on the edge cells.
How do I get more car parts without burning through my cash?
Target the CAR PARTS machine for your first 30 rolls, focus on BLOCKS and WHEELS only, and use Gold Rolls only after you have one Rare drop in each of those two slots. ENGINES and FUELS drop at common and uncommon tiers often enough that rerolling for them is a waste of luck. The Build and Kill Zombies roll guide covers the exact luck thresholds and when Gold Rolls actually pay off.